Tuesday, January 8, 2019

Snowmen Through Time


Snowmen Through Time (a wall quilt) is the first of  6 monthly promises to finish 6 UFO’s.  All that was needed for Snowmen was a label and a sleeve.  


In the year 2000, I started Snowmen and actually finished it.  But I’ve been told a quilt isn’t finished until it has a label....attached.  I made a label years ago.  Never attached it.  Really. After an hours search of boxes of UFO’s,  I found the label.  But with years in between, it wasn’t what I wanted.  So I made another..and attached it this time.


This label is a pocket and in the pocket is my poem which can be folded to fit in the space.  The label and the poem were created on my computer and printed with an inkjet printer on fabric backed with freezer paper then heat set with a hot iron.   The label was then appliquéd to the back of the quilt.  

The entire process (label, poem, and sleeve) took me less than half a day including the hour spent looking for the label I never used.


Snowmen is hand embroidered, hand appliquéd, and hand quilted.  The pattern is by Millie Kelso.  

Tuesday, September 25, 2018

MINI SIXTEEN SCRAP

MINI SIXTEEN SCRAP


Mini Sixteen is my miniaturized interpretation of Edyta Sitar’s “Sweet Sixteen....an appliqué quilt pattern of  sixteen, 16” blocks.   My MINI SIXTEEN  has reduced each block to 6 inches. While the original quilt is 76“ x 76“, my quilt is 29“ x 29“.

All of the appliqué in this quilt is made from batik scraps from my stash, rescued from my friends’ waste baskets, and from dumpster diving at quilt retreats.  Every piece of fabric in this quilt is a memory.  Thank you quilting buddies for handing me your scraps. Hugs to you all. ❤️🤗

 Mini Sixteen Scrap was started in 2010 and finished on September 22, 2018.


HALLOWEEN CLAMSHELL


I haven’t blogged about my quilting for a while. But I have been quilting.  This is one of the projects that I have been working on over the past few years. I started this quilt (CLAMSHELL ALL HALLOWS’ EVE ) in November 2016 and finished in August 2018.  Hand Pieced using Inklingo 2.5” Clamshell Collection.  Hand quilted.  Size  24.5” W x 34” L.
Clamshell All Hallows’ Eve

The quilt front is made entirely out of scraps of fabric. The back is a recent sale purchase from Tomorrow’s Treasures Quilt Shop in Ocala FL. 


Clamshell isn’t exactly what I would’ve liked it to be. The green throws me off a bit. But I did use what I had and it will only be taken out in October to decorate for Halloween.  Plus I really enjoyed the process. I do so love hand piecing and hand quilting.🎃

Tuesday, September 12, 2017

In Memoriam

My Fur Kid Augie died on September 7, 2017. He was 16. We had frequent Winter walks. I wrote this poem in 2008 after one of our walks in a wooded park near our home.

Our Winter Walk

We stood in forest on a path
Snow blowing 'round in swirls
Wind rushing past our faces.
High above us, birds and squirrels
Just me and my companion
Winter's smells and sights and sound
Traffic noises far away
Chattering and peeps all around
Then quick, my buddy's eyes lit up.
A rabbit crossed our path.
His muscles bulged to make a lunge
But manners held him back.
Just me and Augs
My furry love out walking in the snow.
Just us two with forest critters
Hugged by winter's soul.

© Sandra White
12/2008

Friday, June 23, 2017

Half Square Triangles in Red and Beige

For the past several weeks, I've been playing with my scraps.  I stamped some scraps

Stamped 1 inch 1/2 square triangle from tiny scraps
..and when I had larger scrap pieces

Box of larger scrap pieces
I printed more half square triangles with Inklingo.

Larger scraps printed with Inklingo 
I joined red half square triangles with the neutral to make one inch squares
Half square triangles sewn into 1 inch squares

I eventually put together 264 half square triangles into 132 squares.  I added a border and appliqued on the border with more scrapes.  And here she is.  My mini quilt.

Half Square Triangles in Red and Beige
The mini measures 14"x 15".  The little quilt looks a bit wonky in the photo, but that's because of my picture taking skills with my iphone. ( I can't seem to hold it at the right angle.)😐 I still have 4 more color ways of hst's to play with and hundreds of 1" squares to work with.. but I'm using up my scraps.  😏 Yea


Tuesday, May 30, 2017

Tiny Scraps Continued

Finally, finally all my tiny scraps have found a purpose. All are stamped and cut.  Some are 1" squares and some were so small, I stamped them into 1 inch  half square triangles.

Picture 1:  half square triangle stamped and cut.          
 
Triangles:  I had a huge selection of half square triangles in colors and so this is where Inklingo came into play for me.  I already stamped and cut the half square triangles from my tiny scraps so now I needed neutral 1 inch half square triangles to go with them. I used the Inklingo Half Square Triangle 00B collection.

Picture 2:  Large selection of neutral pieces

Picture 3:  Neutral pieces used to prepare hst's

Picture 4: I did tons of these from my bigger scraps

I spent the last 3 days or more - haven't really kept tract - hand piecing the half square triangle colors together with my neutrals.  Today I laid them out to figure out what to do with them.  I'm leaning toward a mix to make a scrappy wall hanging.

Picture 5: A mixture of colors
 Or perhaps all of one color to make several mug rugs. Or maybe mix them up and make scrappy mug rugs. 😊
Picture 6: Blues, yellows, purples, greens

Picture 7: Reds
Squares:  From the bigger pieces, I made 1" squares and they are all nicely arranged by color in a craft box.


Picture 8: 1 inch squares arranged in craft box

I've put some of the one inch squares together into six inch blocks, but  I'll hold off for a while and think of something more creative.  Perhaps an Irish Chain with all neutrals surrounding the colors.  I have a lot of bigger neutral scraps.  The scrap box  (Picture 2) shown above is only one of many. 

Picture 9: Various squares put together into 6 inch blocks
But yea!, I'm free of those tiny scraps. 😄  I feel way better.  They have been hanging around in my sewing room taking up space forever.  When I finally make something from them, I'll feel better still.

Until next time.


Tuesday, May 9, 2017

Stamping Scraps

Since I began sewing, I have always been compelled to make use of every scrap of fabric -  even the tiniest of pieces. I have heaps of those tiny scraps.   I keep most of them in a basket near my sewing machine and I'll put them to some use as starters for my machine piecing. But there are only so many starters that I need and my basket is overflowing.

Now let me tell you, I really enjoy hand piecing.   Machine piecing is okay but it's hand piecing that relaxes me and brings me joy;  and any tool I can find to that end, I will use.  The simpler the better.  I love Inklingo for that very reason.  It's simple and easy and I can print and get to the hand piecing part quickly.

But there are some scraps that are so tiny, Inklingo won't do.  So I've been struggling with how to use these tiny scraps, overflowing in my scrap basket, in hand piecing.

tiny scrap of fabric
You can see this piece on the left is about an inch wide.   One day in my sewing group at the local quilt shop a quilt companion showed me her rubber stamp templates that she was using to stamp out hexagons on her fabric.  Well at the time it looked cumbersome.  In the time it took her to stamp and cut her hexagons, I could have made many more with Inklingo. Inklingo is quicker and easier. 

Then as my mind meandered through the days and weeks, one day I looked at all the scraps overflowing in my starter basket thinking I'd really have to throw them out and then it dawned on me.  I could make use of those tiny scraps. I didn't have to throw them out (which pained me).  If I could find a rubber template square that stamped an inch or less, I could make fabric squares from those tiny pieces!   I looked everywhere on the internet and found very little...maybe one or two places. The first stamp I purchased was 3/4" square finished.


I stamped and cut and stamped and cut and started to hand piece the tiny squares.


6 " block


A number of 6" blocks made from throw away scraps
Now, every time I have an itty bitty piece, I'll stamp it and use it in a block and eventually this will be a quilt.

I know this isn't for everyone.  From what I can tell most quilters don't care to hand piece but if you are one of those rare quilters who loves the process of hand piecing and if you are also one of those people who hate to waste even the tiniest piece of fabric, stamping might be a perfect solution.

Bye for now

Tuesday, April 4, 2017

Grain Free Brownie Recipe

Tiger Nut Brownies Grain Free


Today I decided to take a break from Quilting and do some baking. I've been grain free for a few months so I made these brownies for a group of friends some of whom are grain free.  I was asked for the recipe! 😳  Recipe?  To explain my confusion, in the tradition of my family we very rarely take measurements in our made up scratch recipes. I remember my grandma throwing in this and that and when I asked her for the recipe, she had no idea so she said just watch and I did. Last time I made these brownies, I took no measurements.  So since I expected it would be unlikely that the curious would come over and just watch,  I made them again and this time I did measure so guess what?...they will come out the same every time.  That's a good thing I suppose. 😏  These brownies are moist and chocolaty and just great and the recipe is ready to share.

Tiger Nut Chocolate Brownies©

Oven Temp: 350 F
serves: 32 brownies give or take
Ingredients:
¾ C Tiger Nut Flour
¼ C organic non alkaline cocoa powder.
1 T arrowroot starch
½ t baking soda
½ t cream of tartar
2 t apple cider vinegar
1 t vanilla extract
½ teaspoon finely ground sea salt
½ C organic raw sugar

3 T Kerry Gold Butter at room temperature + 3 T walnut oil
3 Jumbo eggs

½ c semisweet mini chocolate chips
(I used Enjoy Life Semi Sweet mini chips - Amazon)
½ C walnuts chopped.
¼ C raw pumpkin seed
¼ C raisins
¼ C pitted chopped dates soaked in just enough purified water for a few hours or in microwave for 30-45 seconds: drain.
Reserve liquid. Makes a nice addition to green tea.

Instructions:
Grease (Kerry Gold or Almond Oil) a brownie pan (I used a pan with a bottom measurement of 8.5” x 10.5” ). Line bottom with parchment paper. Heat the oven to 350 F.

Pulse the walnut, raw pumpkin seeds, raisins, and dates till well chopped and mixed. I used a small food processor.

Mix the tiger nut flour, cocoa powder, arrowroot starch, baking soda, cream of tartar, sugar, and sea salt, into a small bowl and whisk them together until thoroughly combined.

Whisk together butter, walnut oil, and sugar in large bowl. Add eggs, vanilla, and vinegar.
Beat in dry ingredients 1/3 at a time.

Stir in pulsed ingredients and chocolate chips

Pour the batter into a prepared brownie pan and bake for 15-20 minutes (varies more or less I used convect bake for 17 minutes). The amount of time in oven depends on your oven, whether you use convect bake or just bake, and the size of your pan. Watch. When the center looks done, take out and test.
Test for doneness with toothpick in center. If comes out clean it’s done. Don’t let it get too done or brownies will  be dry. Cool for ½ hour or more. With parchment paper bottom,  lift out onto board or plate and cut into small pieces (very rich). If you have left overs. can be stored in freezer and they are very good freezer cold. I like them better frozen.


Tuesday, March 28, 2017

Unfinished Projects


I haven't checked in for a while but I have been finishing up some UFO or CEO's (Completely Executed Objects - as the local quilt shop owner tags it).  It looks like my membership in the CEO club at Tomorrows Treasures in Ocala will be going on for years. 😏 I have that many.  The rules:  There is only one, one predetermined  UFO  must be completely finished in the one months time until the next meeting and that includes a label.  So far so good.  The CEO club goes for 6 months.  So each year, I'm to finish 12 UFO's.

January 2017 - Miniature Texas Star.  I started this quilt in January 2014 and finished in January 2017. Progress on this quilt can be seen on my previous blog. I started out naming it Texas Star Fish because of the fish fabric🐠🐠 used to make the Texas Star but ended up naming it Miniature Texas Star.  This wall quilt was hand pieced using Inklingo Shape Collections and hand quilted. 


Texas Star Fish Front

Texas Star Fish Back
February 2017 - Hearts at Storm:  The top was finished in the year 2000 using the paper piecing method and the storm at sea pattern.  It is machine pieced and machine quilted on my HQ Sweet 16 with free motion hearts.  It was finished in February 2017, but the label didn't get printed until March.  I like to make my own labels and thinking through and creating a label took me longer to do than the machine quilting.😉

Hearts at Storm

Hearts at Storm Back
March 2017 - Tumbling Stars.  I started this quilt in March of 2014 and finished in March of 2017 including the label.  Using Inklingo Shape Collections and moving the patches around on my design wall, I finally came up with a pattern I liked. 😊 This quilt is hand pieced and hand quilted.


Tumbling Stars

Tumbling Stars Back with Label
Well that's it for now.  I have more projects from last year and I'll fit them in a blog soon,  In the meantime I'll update as I move through the projects for this year. 

April 2017 - Coming up my next UFO is an Elsie Vredenburg pattern (Big Red) that I put together is the late 90's.  Elsie used paper piecing, but I found applique to be easier.   It now needs a border and quilting.  I haven't decided for sure but I'll probable machine quilt on my HQ Sweet 16.

Until next time


Sunday, November 20, 2016

Clam Shell Quilts

Halloween Clam Shell 2.5"
Since I began to quilt, I've always loved clam shell quilts.  I loved the symmetry, the gentle curves, the scrappy look. Before I took to hand piecing or hand piecing took to me, I never  imagined I would make one.  Even after I discovered hand piecing,  my brain rebelled.  Tracing templates, plus marking sewing lines and registration marks, was way too tedious and time consuming. Plus I'm not a really big fan of large bed size quilts.  I get great ideas, but the follow through sometimes escapes me.  Doing a large bed quilt in clam shells would probably end up as an incomplete. 

Then a few months back, Linda Franz created several new Inklingo Clam Shell Shape Collections.    Two were small!  Big smile here.  😊  Finally I could make a clam shell that had sewing lines and registration marks that were easily printed on the back of my scraps...and it would not take me forever to make  (thus in line with my short attention span and lack of follow through). And here it is.  I started before Halloween, but it didn't get finished because....
I'm waiting for Linda Franz to come up with 2.5 inch edge collection.  I just know she will (right Linda?).  Hopefully before next Halloween. 😉   Well some would say, just cut off the edges why don't you.  No can do.  I'm OCD about wasting fabric.  😏  In the mean time, in between other projects, I'll wait or add an embellishment or two.  I'm thinking about making a few of the black clam shells into little cat faces peeking out.  I can make a game of "Can You Find the Little Cat Faces".  😸  (Bye the way, I'm having great fun with these emoji Blogger is finally allowing for.)


Friday, November 11, 2016

Snowbuddy: A Symbol of Renewal

I'm in a club at a local quilt shop. The cost of admission is $10 and it carries one requirement...to finish a pre-selected UFO each month.

Snowbuddy was my September pick. You can see the original Snowbuddy below. He hung on my sewing room wall in Toledo Ohio for years and years, waving and smiling and encouraging me on. Snowbuddy was wonky and poorly quilted but he was  my own creation and he was ever so happy.  My buddy smiled back at me from his place of honor from the time he was created in 1998 until the time we moved to the South in 2015.

Original Snowbuddy

After I arrived at my new home,  Snowbuddy was unpacked. I took a good look at him. Fabrics used in 1998 were beginning to show ware. (That was before I discovered quilt shop fabric.) The workmanship was poor.  The applique was good, but the machine quilting was really bad and my buddy needed a wash.   My skills had miraculously improved with the decades it was time to put these improved skills to use.  This Northern girl was about to start her new, unexpected Southern life with a new, renovated, spruced up Snowbuddy.

First, my buddy was lovingly disassembled. The machine quilting was carefully un-quilted. The binding and borders were removed.  He was given a gentle wash and hung up to dry.  The embellishments were removed and he was given a press.  My wall hanging was now ready for reassembly with new borders, backing, batting, and hand quilting.

Snowbuddy got a new face.  Tufts of cotton became his eyebrows and nose.  Buttons were stitched on for eyes. 

Embellishments were added:   A winter moon, hearts, stars.  The star on the right was hand pieced using Inklingo and then appliqued down.  New buttons were added along with a hand crocheted red scarf. Hand embroidery was added to the hat and mouth.   
Snowbuddy 2016
Then finally a label was printed and attached.

Snowbuddy helped me through the transition from North to South.  I worked on him here and there for over a year.  Each day this quilt was renewing, so was I.   I miss the north with the change of seasons.  I miss winter and the snow.   Snowbuddy allowed me to remain in touch with winter, as I sweat through the heat in the south.  My buddy now hangs in a place of honor in my Florida sewing room, smiling, waving, and encouraging me on. Looking at him, I can almost feel and smell the fresh Northern Winter air.

Tuesday, June 7, 2016

Tumbling Stars


Working on projects from the past.

Tumbling Stars
Two years ago in July of 2014, I mixed tumbling blocks with stars and made this small quilt top. (Tumbling Stars July 2014 ) I told myself at the time that I would square it up with neutrals. Well here I am in June of 2016.  While looking through my UFO's last month, trying to figure out what I wanted to do next, I made this marvelous discovery.  There is was, still waiting for the square up. When something that old is found, it's like a special gift and new again.     After doing some thinking and figuring, I finally just today got it properly squared.

All of my piecing was done with patches made with the help of Inklingo.  It's all  hand pieced. The Stars were pieced using the 60 degree 1.0 inch Hexagon collection together with the Star Point 1.0/2.0 inch add on collection. The tumbling blocks were made with the 60 degree Diamond 2 inch collection.  The neutral square up was made with the same collections plus the  60 degree 2 and 4 inch triangle collection. I'm still using my stash and haven't purchased any new material to make this top.

I'm now trying to decide on whether or not to put in some colored borders. It seems the colors are floating in there with nothing to tie them together.  Hopefully it won't take me another two years to make a decision on that.

Tumbling Stars Squared with Neutrals
Once I decide on borders I'll be hand quilting it to finish up.  I've been enjoying hand quilting lately.  I haven't done much of it in the last 2 years, but loving it now.  Like hand piecing, it is very relaxing.  I finished up this very old wall hanging last month...A small project with little thought required while I figured out the squaring up of  Tumbling Stars.

3 Block Sampler from copyright1983
I pieced this wall hanging way before Linda Franz came up with Inklingo. I used Paper Pieces pattern that I found at a local quilt shop in the late 90's.  Must have been hanging around that shop for a while since the copyright says 1983.

While I'm thinking up what more to do with the Tumbling Stars, I'll pull out another small project to hand quilt.  In the mean time, I'll leave the Tumbling Stars on my design wall and peek at it now and then until I'm inspired.

Bye for now from Central Florida, (where my rain gauge measured 14 inches this morning from yesterday and overnight rain thanks to tropical storm Colin).


Sunday, May 1, 2016

Carpenters Wheel

After a month of hand quilting, I've finished quilting my Carpenters Wheel,  made with the help of Linda Franz'  Inklingo Free Shape Collection.  I finished the top a number of years back when I first caught the Inklingo bug. It's my first Inklingo project and made entirely from my fabric stash.

Carpenter's Wheel Hand Pieced and Hand Quilted
It's a nice lap size and will come in handy during Ocala Winters.  Surprisingly temperatures actually got in the 20's F in Ocala last Winter.

I love hand piecing and Inklingo has made it so enjoyable that I tend to move from project to project and hand piece tops and don't get to quilting them.  This time I made a promise to myself to take on nothing but the hand quilting of this top until done.  I've made promises like this before.  This time I kept it.


My two boys always hang out with me - watching me quilt.    


They're actually bored.  Don't they look bored.  


Thursday, March 10, 2016

The Splendid Sampler and Milleflori La Passacaglia

THE SPLENDID SAMPLER


Blocks 1- 3 top row; Blocks 4-6 2nd row; Block 7 bottom


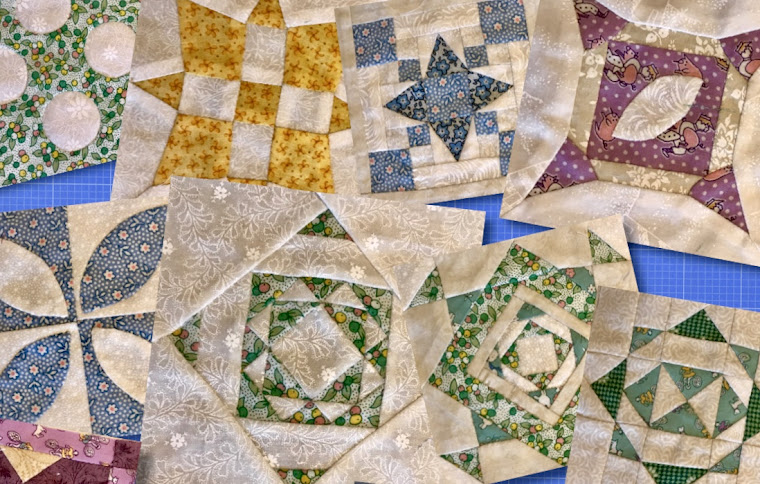
In February, Jane Davidson and Pat Sloan, began their 100 block year long odyssey, The Splendid Sampler.   Each week 2 blocks are published after being created by the 80 + Splendid Sampler Designers.  It's been fun for me to prepare the blocks so I will continue to post my progress here from time to time.   I encourage you to visit the site to learn more.  

I love to hand piece so I've been busily converting the blocks to hand piecing friendly but for those of you who would rather machine piece, there are excellent instructions for each block from it's designer including tips and different ideas for piecing.

I've posted my first 7 blocks in the photo above.  Converting to hand piecing is simple when I use the Inklingo Shape Collections.  

I use the Inklingo Shape Collections whenever I can.  There is a list of shapes on the Inklingo site created by Cathi Godwin that is a valuable tool I use all the time.  If I know what size and shape patch I need, Cathi's list leads me to the shape collection where I can find it.

Block 1 - Hearts Aflutter: 3 inch squares and  1.5" squares from Storm at Sea 9 inch, 

Block 2 - Wings: 1 inch squares from 1 inch log cabin and 1 inch half square triangles from TRI HST 00b

Block 6 - Focal Point:   I used HST 00b collection and 1 inch log cabin again.

EQ7 is also a valuable tool.  I create the blocks in EQ and then make templates for my piecing. Below are Block  3 - Lots of Love on the left;  and Block 5 - Simple Simon on the right.  Each block shows the templates on the back of freezer paper.  

Block 3 and Block 5

Blocks 4 and 7 are hand appliqued and hand embroidered...which I love to do just as much as hand piecing.  They went together quickly.  
Appliqued and Embroidered Blocks


I'll be working on Block 8 - Friends Around the Square .  This lends itself well to EQ7. 


LA PASSACAGLIA

In between I continue to hand piece La Passacaglia with the aid of Inklingo Shape Collection for this project. This is a big project and will take considerable time.  

Rosettes 1 and 3 joined top left.  Three of the required, completed  Rosette 2
I'm currently piecing Rosette 4.  There are nine of them.  As you can see, my colors are all over the place but I have a little of blue and white in each rosette.  Hopefully this will tie it all together.   More photos of progress to come.