Showing posts with label Miniatures. Show all posts

Tuesday, September 25, 2018

HALLOWEEN CLAMSHELL


I haven’t blogged about my quilting for a while. But I have been quilting.  This is one of the projects that I have been working on over the past few years. I started this quilt (CLAMSHELL ALL HALLOWS’ EVE ) in November 2016 and finished in August 2018.  Hand Pieced using Inklingo 2.5” Clamshell Collection.  Hand quilted.  Size  24.5” W x 34” L.
Clamshell All Hallows’ Eve

The quilt front is made entirely out of scraps of fabric. The back is a recent sale purchase from Tomorrow’s Treasures Quilt Shop in Ocala FL. 


Clamshell isn’t exactly what I would’ve liked it to be. The green throws me off a bit. But I did use what I had and it will only be taken out in October to decorate for Halloween.  Plus I really enjoyed the process. I do so love hand piecing and hand quilting.šŸŽƒ

Tuesday, May 9, 2017

Stamping Scraps

Since I began sewing, I have always been compelled to make use of every scrap of fabric -  even the tiniest of pieces. I have heaps of those tiny scraps.   I keep most of them in a basket near my sewing machine and I'll put them to some use as starters for my machine piecing. But there are only so many starters that I need and my basket is overflowing.

Now let me tell you, I really enjoy hand piecing.   Machine piecing is okay but it's hand piecing that relaxes me and brings me joy;  and any tool I can find to that end, I will use.  The simpler the better.  I love Inklingo for that very reason.  It's simple and easy and I can print and get to the hand piecing part quickly.

But there are some scraps that are so tiny, Inklingo won't do.  So I've been struggling with how to use these tiny scraps, overflowing in my scrap basket, in hand piecing.

tiny scrap of fabric
You can see this piece on the left is about an inch wide.   One day in my sewing group at the local quilt shop a quilt companion showed me her rubber stamp templates that she was using to stamp out hexagons on her fabric.  Well at the time it looked cumbersome.  In the time it took her to stamp and cut her hexagons, I could have made many more with Inklingo. Inklingo is quicker and easier. 

Then as my mind meandered through the days and weeks, one day I looked at all the scraps overflowing in my starter basket thinking I'd really have to throw them out and then it dawned on me.  I could make use of those tiny scraps. I didn't have to throw them out (which pained me).  If I could find a rubber template square that stamped an inch or less, I could make fabric squares from those tiny pieces!   I looked everywhere on the internet and found very little...maybe one or two places. The first stamp I purchased was 3/4" square finished.


I stamped and cut and stamped and cut and started to hand piece the tiny squares.


6 " block


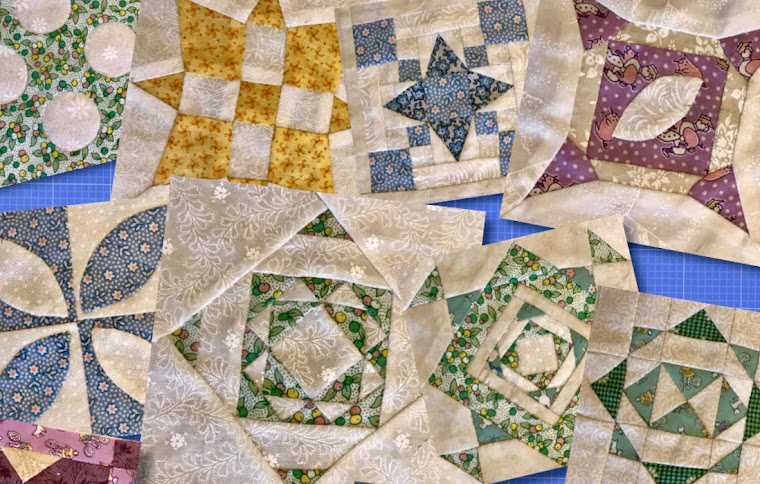
A number of 6" blocks made from throw away scraps
Now, every time I have an itty bitty piece, I'll stamp it and use it in a block and eventually this will be a quilt.

I know this isn't for everyone.  From what I can tell most quilters don't care to hand piece but if you are one of those rare quilters who loves the process of hand piecing and if you are also one of those people who hate to waste even the tiniest piece of fabric, stamping might be a perfect solution.

Bye for now
Tuesday, August 5, 2014

PATCHWORK OF THE CROSSES

LUCY BOSTON PATCHWORK OF THE CROSSES


PATCHWORK OF THE CROSSES SECTION IN RED/WHITE


Made with Inklingo 90 degree .5 inch Hexagon collection, these small hexagons would be impossible for me without Inklingo. The crosses are made with a red Thirties fabric I've had around for many years plus another small print red I've had around just as long. This will be a small quilt.  I've got no more of these red fabrics left. I've got enough pieces printed and cut for another 12 POTC Blocks.  I'm joining them with tan fabric that has tiny red leaves to match the red of the crosses. So this little project can't go very far but it's great practice for the next one.

A Single POTC Block made with 1/2 inch Hexagons
I am thoroughly enjoying working with these little pieces.  I'm having a lot of fun.

Sunday, February 9, 2014

Churn Dash Finished

I went down memory lane tonight and watched the Grammy's Beatle Tribute - 50 year anniversary.  While I watched I finished my churn dash mini quilt.  It now has been embroidered and quilted, the little buttons put on, and then the binding.

The mini quilt was hand pieced and hand quilted.  I used EQ7 to create the setting and play with fabrics; and Inklingo to create the pieces for the 3 " blocks.  See Sunday's Blog February 2,  for Inklingo Shapes I used.  I can't begin to express how absolutely thrilled I was to discover that I could use Inklingo shapes to make this quilt!

Thank you Linda for opening up a whole new way to play.


Churn dash blocks with embroidered leaves and button flowers

Close up of one block

Back showing quilting

Sunday, February 2, 2014

Churn Dash

This block has many names.  You might also see it as Monkey Wrench, Dragon's Head, Fisherman's Reel, Hole in the Barn Door, Indian Hammer, Lincoln's Platform, Quail's Nest, Sherman's March, and Wrench.  ...and there are probably more.

The Prairie Women's Sewing Circle meets once a month at Quilt Heaven.  I'm part of this sewing circle. This is my interpretation of one of the projects we are doing.  I'm all about hand piecing and using Inklingo  allows me to make these small blocks with ease.  With the awful weather we are having it's so relaxing, sitting in my chair in front of the fire with the dogs all around taking my stitches, seeing this mini quilt come to life.


My progress so far.  The blocks are 3 inch finished.  --- Using Inklingo's Log Cabin .5, and Half Square Triangles 00B), I'm hand piecing.   The quilt is made with 1/4" sashing across (between columns and 1/2" sashing down (between rows). Still need to add one more border and embroider little flowers in each block.

The blocks.  
Joined into rows 3 across.  Two rows sewn together.
Rows all sewn together. One more border needed.
Border added

Saturday, February 9, 2013

APPLIQUƉ

Block 1
Block 2
Block 3

APPLIQUE BLOCKS FROM

SWEET 16 PATTERN BY 

Edyta Sitar


This pattern is originally planned by the pattern maker as 16 inch blocks.  I'm doing them in 6 inch blocks.    


Block 4

Block 6


Block 5